


Hello everybody! Welcome to my blog! I am a Primary School English teacher learning about TICS! In this blog I will tell you about different tools and ideas to use in your class! Do not hesitate to ask me if you have any question!
Friday, 20 March 2020
Monday, 2 May 2016
Final mission
Hello readers! Today I am sad! Our ICT adventure #ictclil_urjc is about to finish! We have learnt so much, and it would be nice to look back and reflect about it.....
At the beginning I created my final mission with Go animate. However, once I had finished I realised that the tool was not among the ones that teacher wanted us to use, furthermore I was not very happy with the final result. So I decided to change it.... This is ICT! you try and try until you come up with the tool that you like! Nevertheless, I highly recommend that you have a look at the instructions twice, in this way you will not have to repeat things!
Despite all the drawbacks that I found, I can say that I am absolutely happy with my final result, Following the advice of my peer Raquel I decided to use Capzles, an online free tool to create time line stories. I had never used this tool before, but I liked it so much. You just need to log in and start creating! You can choose your background, selecting one from the options that the app has, or creating your own one with your images! Then you can start adding the material into your timeline- You have the possibility to choose between 2 options, upload one doccument or a "stack" with lets you place multiple files in a single moment. I decided to upload a "stack" and then include pictures of my challenges, in that way I consider that I achieved a neat timeline that fully describe my experience in this fantastic subject!
We had 7 different modules, and we learnt a lot from all of them.
I still remember my first day in ICT class.... I have to confess that I was a little bit scared, I am not very good at using the computer, However, I have found out that there is a super ICT teacher inside me, able to do fantastic things with free online tools!
If I had to choose one moment of this subject and the challenge that I enjoyed the most I would choose the choco-talk. We work hard together as a team, and that was really nice. thank you to my teacher and thank you to all the people who have taken part in this ICT adventure! Did you miss it? Don´t worry at all! You can click here and watch it again!
And I really love the tool that we used to create the tutorial, because I like the idea of recording everything is happening on the screen! Do you want to see our tutorial again? Click here!
Doing a final mission like this one has been really useful, in this way we can reflect on how much we have learnt! Seeing all my challenges together and talking about them I realise that I am a new teacher.... A SUPER ICT TEACHER !

Thank you to my teacher and thank you to all the people who have taken part in this ICT adventure!
Thanks for everything everybody, this class would not have been the same without you!!! :)
And thank María Jesús for teaching me all these things!


I can't wait to put all of them in practice!!!
See you soon super ICT teachers!
Check my final artifact here
- *All the images and gifs have creative commons license.
Monday, 25 April 2016
Creating rubrics to assess e-projects
 Hi readers! It's Ana again! Have you ever had problems when assessing your students? Do you want to create a rubric to make the process of assessing easier and you dont know how to do it? Keep on reading!This week we have been working in our ICT class with a new tool to create rubrics and I am going to tell you everything about it!
This mission consisted of creating a rubric that evaluates our eproject and in which we define the key aspects in our e-project, the expected progress and our own assessment criteria.
I had never created anything similar before. Of course I had evaluated things done by my students but never by using a rubric, let alone, by using my own rubric. For that reason I liked this challenge, it made me reflect on the importance of assessing in a fair way, giving our students clear feedback that they can take into account in order to improve.
In this sense, rubrics are a valuable tool, since you can let your students know the criteria that you used to evaluate their work. Furthermore, you can give them the rubric in advance so they know exactly what is expected from them!
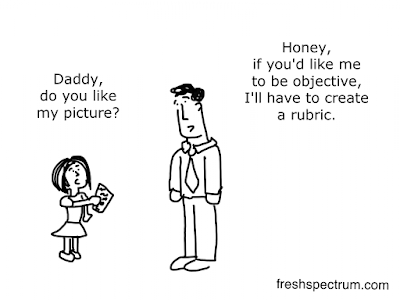
Image from: http://freshspectrum.com/
Despite you can create one table with Word for example, it is important to know other options that are available on the Internet.
After having a look at different e-tools, I finally decided to use Quick Rubric, an online tool in which you can create your own rubrics.
Even though this tool is very easy and intuitive, I would like to tell you how to use it so you will not have any problem when working with it:
First of all you need to log in, otherwise you cannot save your final result. So you have to click “I’m new user”, then you fill in the gaps with your personal data, and once you have your account you can start creating your rubric.
You have to decide the maximum and minimum score, that means that if for example you have 3 different items to analyse and you want to have a scale of rating of 3 progressive ratings (beginning 1 point, emerging 2 points, and proficient 3 points) then your maximum score would be 9 (3x3) and your minimum 3 (1x3).
However, if you are not happy with the number of scales of ratings you can add a new one (add column) and you can also increase the number of elements to analyse by clicking the option "add a row".
This application offers you the possibility of saving your rubric in case you want to carry on working on it later (remember that you need to have an account for that).
You can add a title if you want to and also a description for your rubric at the top of the page.
In order to share your rubric with the world you need to save it, go To “My rubrics” then click on “view/print” and then at the bottom of the page you will find the URL of your rubric. In case you want to modify something, you have the option “edit” at the bottom too.
Here you can see mine
I consider that this tool is really good, I found it really easy and intuitive. Nevertheless, there are some things that, from my humble opinion could be improved: It would be nice to have an option to share your final result with the social networks, at least with the most famous ones such as twitter, blogger, facebook.... Moreover, you should be able to copy it for example to a word document, but it seems that it is not possible. The only alternative to this is to print it directly. I was not able to see an option to create an embedded code either. And finally I would personally include an option to save your work as a draft automatically, which is not currently available in this application
However, our mate Laura came up with a solution for all these problems and found the way of creating an embedded code to put in our blogs! When creating the rubric in Quick Rubric you have to click on print, and then save it as a pdf documment. Here you have two options: If you want to convert it into word you can convert it by using many online free programmes, for example this one called Nitro. And, if you want to create an embedded code for your blog you can do it too, you have to copy the rubric in google drive, and once you are there you have to make your documment public and then it gives you the possibility to get an embedded code and a shareable link. This is the final result:
Despite all its drawbacks I consider that it was a really nice tool since it allowed me to accomplish the task of creating a rubric and as I said before it was really easy.
In fact I used it to evaluate one CLIL e-project and it works very well. The CLIL e-project that I used was the one done by my peer Víctor : Education is the beginning After having a look at his blog in depth I can conclude that taking my rubric into account he has a score of 26/27. I scored his blog with 3 points of scale of ratings in all the criterias except in the one in which the criteria says "License usage". Even though I know that all the images that Víctor uses are from pages such as Pixabay or they are creative common images in some of the entries he forgot to attribute them. But overall I can say that it is a perfect blog, and I highly recommend that you have a look at it because you will learn a lot! :)
What do you think? Do you like my rubric? Did you find it useful? Had you ever created a rubric before? Please let me know your opinion and experience by posting a comment!
Have a nice Monday!
All the best!
*The image used is from Pixabay

Thursday, 21 April 2016
What type of reader are you?
Hello! It's Ana again, a student of the Master in Bilingual education at Rey Juan Carlos University! You can follow our tweets in the hashtag #ictclil_urjc

Aurasma is an augmented reality platform, you can download it for free in your iOS or Android mobile device. This application's technology uses the camera of your device to recognize real world images and then overlay different media on top of them (animations, videos, 3D models and web pages). You need to have Aurasma in your mobile in order to be able to check if the "Aura" (the augmented reality) that you created works well or not.
But first of all you need to start working in your augmented reality in your computer! How can you do that?
The steps that you have to follow to sign up in Aurasma and start creating your own Auras in your computer are not difficult. I would like to recommend that you see a fantastic tutorial made by my partners @nepeuspu @Alvaro_Gope @Marta_Gayarre so you can understand all the steps.
As you can see it is not difficult at all! Don't you think so? So this is exactly one of the challenges that we have been working with in our TICS subject. As you probably now, next 23rd of April we celebrate the World Book Day. For that reason our work is related to this topic:
Our teacher María Jesús asked us to create our own augmented reality but with one condition, we had to tell the world what type of books we read, which our favourite book is and why we recommend it and finally what features define us as readers. This was going to be the overlay of our augmented reality.
From the very beginning I knew exactly what I was going to talk about.
I consider myself as a super reader since I try to read as much as possible, my favourite genre is fantasy and without doubt my favourite book is Harry Potter and the Philosopher Stone, However, not only do I read fantasy books, but also other kind of genres. I like when people that I read books, when these books are different from the ones I am used to reading. If it hadn't been for these recommendations I wouldn't have read these books:

"La piedra de toque" by Monserrat del Amo.
"El curioso incidente del perro a media noche" by Mark Haddon
"El niño con el pijama de rayas" by John Boyne
"El mundo azul ama tu caos" by Albert Espinosa
"El niño con el pijama de rayas" by John Boyne
"El mundo azul ama tu caos" by Albert Espinosa
"Wonder" by R.J Palacio.
Once I knew what I wanted to say, I recorded my voice with my mobile phone. When I liked the final result I thought that, apart from my voice I wanted to create a videoclip to appear in my overlay. In this subject we have been working with some video editors. However, I wanted to investigate and look for something new. I had a look at internet and I came across with KIZOA which is a free movie maker online tool, what's more, you are not required to register if you don't want to. I started trying how it worked and the thing is that I liked it so much, so I decided to create my video with this programme. To create videos with this application you can use a template already done or create your own video from the beginning. I decided the second option. Then you can add your photos, music, animations, trasitions between the photos, and effects (for example to make your video look like an old film). You can also choose how much you want your photos to last in your video adjusting the seconds. At the end you can download your creation or share it in several social nets such as YouTube, twitter or facebook. I decided to share it in YouTube, here you can see it:
Once I had the video I moved to the next step and I create a meaningful collage of create a meaningful collage of myself portrait as a reader. Always using Creative Commons images. To create my collage I used Piktochart since it is an online e-tool that I am already familiarise with. I chose the option create a poster and I started creating the collage by adding photos, choosing a background and deciding a title:

When I had both (the video and the collage finished) I followed the steps of the tutorial that I told you above. I signed up, then I completed all the gaps accepting the terms. I click in create a new Aurasma, once I was there I selected my trigger image (the collage about Harry Potter) and I saved it, after that I uploaded the video, selected it and click saved! Then my video appeared on top of image, I made it bigger and then I pressed next again. Then, I decided the name "What type of reader are you?"and I saved it! I had already created my aurasma!
In order to make sure that I had done things right I tried with the Aurasma application for mobile phones and .... What a surprise! The overlay media came out!
Would you like to see it? Here you are the image, go to your Aurasma mobile app and put the camera in front of the image! What can you see? Isn't that fantastic?


As a teacher, I think that we can use this application for many purposes. For example to flipped our lessons. In this way we could create Auras and then give our children the images, so they can have a look at them at home. I let you a video in which you can watch a full explanation of flipped classroom. Or we could ask our students to do a similar activity like the one I have done. Why don't we ask them to talk about their favourite book and create an Aura to do so? That activity would be really nice to put in practice in our lessons as our children would be practicing their speaking skills at the same time the discover the fantastic world of the TICS. Furthermore, they could encourage other peers to read their books!
The final result was added as a pin to the collaborative board "A Wall of Books" that our teacher María Jesús created. So we can celebrate the World Book day all together! I like having this open resource bank shared with a lot of people since I am sure that it is going to be useful for the future to work with my children. Thanks to these walls I will find it easier to find resources!
I hope you enjoy this post! Do not hesitate to ask me if you have any question!
And have a nice World Book Day!

*All the images and gifs used in this blog have Creative Common License.
Friday, 15 April 2016

Create a collaborative slideshow that supports learners:
Hello! This is our last mission working in teams. It consist of creating a collaborative slideshow/animation/screencast/story/comic about a CLIL goal that matches our eprojects and that supports learners.
We all agreed to create a tutorial to explain our children how to use Infographic, since it is the tool that they are required to use in the final activity of our CLIL e-project to present the candidatures of their countries.
To create our
tutorial we have used “Screencast-O-Matic” which is an online tool that allows
to create videos with screen shoots with high quality of image and sound. This
tool also gives you the possibility to share your final product in YouTube or
download it.
There are two versions, we used the free one, which we
consider that is very complete. You can select the part of the screen you want to appear in your video and record it for 15 minutes. Moreover, you can use use the webcam so your image will appear in a little slide in the corner.
From our personal point of view, we can use this tool
in our classes for many purposes. For instance, we could ask our children to create a StoryJumper and then record the screen while turning the pages telling the story (they can imitate the characters´ voices). In this way, they would be able to practice their speaking skills at the same time they practice their ICT skills, and all of this in a meaningful and engaging way.
We appreciate this activity, as it made us reflect on the need of creating tutorial in our classes. Even thought working in groups make things easier, there are some tools that are
difficult to manage and need clarification from the teacher. Some children can feel stress because they are not good at using ICT tools. However, if the teacher knows how to solve this problem and scaffold those children, we can integrate the TICS in our lessons without any problem!
Therefore, creating a tutorial is a good thing to bear in mind when introducing difficult e-tools in our classes.
To make it look even
nicer we edited the video with “IMovie”, exactly the same we used for the
previous challenge. We were really happy with the results we had in our video
and we thought that this app was perfect to create the tutorial as well! In our opinion it has little details that could be improved, although in general it is a good e-tool.
Creating tutorials is
something really good that even our students could do! As Vygotsky said peer
learning is quite beneficial, why do not ask our students to share what they
know? We could ask them to create a tutorial explaining how to cook, or
something they are really good at, in this way they could feel special,
practice their ICT and speaking skills and teach their peers at the same time!
Isn’t this fantastic? What do you think? Do you use tutorials in your class?
You can see our final
result here:
This is going to be part of the AporTICs nationwide collaborative project, so when we finished it we submited our tutorial to their blog and now we are looking forward to having it published!
We also included a common license to our tutorial. As we have seen in this subject we have seen the importance of using them. In this case we chose this one
 As we want others to be able to share our work but withouth modifying it and we do not want anyone to benefit economically from our creations.
This is going to be part of the AporTICs nationwide collaborative project, so when we finished it we submited our tutorial to their blog and now we are looking forward to having it published!
We also included a common license to our tutorial. As we have seen in this subject we have seen the importance of using them. In this case we chose this one
I am looking forward to hearing from you! Let me know your opinion by posting a comment!
Thanks for reading!
gif from: http://www.gifanimados.com/
Thursday, 14 April 2016

Our chocotalk!
Last thursday (7th of April) we celebrated our chocotalk! Do you know what a chocotalk is? You can read all the information hereI will described the chocotalk as the best challenge I have had in this subject! It was really funny and we learnt so much! We were given different roles: Víctor and Elena were responsible for writing tweets during the chocotalk so everybody could read what was going on! They did a really good job almost like proffesionals! They used the hashtags #chococharlas and #ictclil_urjc in case you are interested in having a look at them. Inma and Lola were the speakers, they participated in the chocotalk giving their opinions about the different topics. And finally Natalia and I who were the curators, we tried to summarize the most importtant aspects of the chocotalk. You can see the final result below.
In order to do that, we used the tool Storify. I have to say that I had never heard about it before and I was impressed with its results. I think we can use this application in our classes with our students, for instance I remember that in the school where I did my training period they did one activity with twitter. The students were asked to tweet the events that happened during the 23F as if they were really living them. It was an interesting activity in which everybody collaborated. I believe that after having done it, it would have been interesting to summarize the final result with the best tweets, and they could have used storify to do that. You can see the twitter here
I also think that we could use this tool to comment and work with important news that we want our students to know. They could summarize them and add their comments. This is a good activity since apart from concepts, it is important to teach our students to be competitive and critic citizens.
So here you can see our final result:
We hope you like it! You can also see the whole video again:
We are looking forward to doing this activity again!
I have seen that there is one school that does chococharlas as well! Have a look at its video. In my opinion it is really nice. Not only do they practice their speaking skills but also they have fun at the same time.
Gifs from: http://www.gifanimados.com/
Friday, 8 April 2016
Planning a video challenge
Hello everybody!We are the group composed by Ana Martín, Víctor, Natalia, Inma, Elena and Lola
For this mission we have been asked to complete a storyboard for a short video challenge to include in our CLIL eproject, which we will later make.
First of all we thought about one common learning outcome and we all agreed that it could be “to learn about the physical and political features and some of the most distinguishing representations of the European countries”.
So we created our story board using StoryboardThat
We would like to recommend that you use this fantastic tool if you have the chance since it offers many possibilities. You can choose the length by choosing the number of vignettes. You can choose among a wide range of scenes (you can choose among the typical ones such as the school scenes but you can also choose castles, islands...), characters (you can even change their emotions and create angry and sad characters.) and text tables. Therefore, you can adapt your stories for any purpose. For instance, we could use it in our class to introduce one topic in a more visual and fun way.
However, we found out some things that from our humble opinion could be improved. For instance, we did not like the fact that the work you do is not automatically saved. Therefore, you have to be saving it all the time. Even though the page reminds you to save, it would be fantastic if it could be done automatically.
It would also be very nice if SoryboardThat could have an option to record voices, that would be awesome. Our students could practice their speaking skills, writing, computer skills and also their creativity when creating their comic!
Furthermore, students could create their own stories about any topic of the curriculum (for example we could ask them to create a story in which they had to include information about Egypt or any topic they are studying). In this way not only would they work one subjects but also they would put in practice and would improve their ICT skills!
Of course these kinds of tools are fantastic to communicate with children with special needs. Sometimes, they find it difficult to understand abstract languages and concepts, and this tool makes the process of communication easier. We can also use this comic for the routines: think about first grade of Primary School, at the beginning they find it difficult to get used to the routines of Primary, we could help them to remember them all by creating comics around the class (For example, before going to the playground take your snack, make a line and keep in silence).
Here you are the link of our final comic,

Made with Storyboard That
And also the final result of the Infographic created by the children of our story using Piktochart (the same tool we used for the previous challenge)! You will learn some things about Norway and why they think it is the best country to host the next Olympic Games!
Norway: Norway | Piktochart Infographic Editor
All the images included are from Pixabay
 Once we created our Story Board we started working in our video. Thanks to the story board that we had created previously we did not have any problem with the video as we already knew what we were going to say. To do the video we used "IMovie" with the support of an Ipad. We would really like to recommend that you use this tool if you have the opportunity because it is really easy and intuitive. You can do many things with it, for example adding music to your videos, images, cropping your videos. Defenitely this tool was fantastic to accomplish this challenge! As it is so easy to use you can even use it with your children in your class! Just imagine the results presenting their candidatures for the Olympic Games.... they would enjoy this activity as much as we did and they would be practicing their speaking skills and learning new things without realising! You can see our video here:
 Both of our final products (the comic and the video) are going to be part of a nationwide educational collaborative project, the ESL times click here to know more information about this project! Without doubt, it is a really good initiative for students, since it encourages them to use the new technologies while they learn English! As teacher we should be aware of these kinds of blogs in which our students can participate, since it is a motivating activity for them! Click here to see our post in the ESL blog
We hope you enjoy as much as we did!
Do not forget to post a comment! We are looking forward to hearing from you!
gif from: http://www.gifanimados.com/
Subscribe to:
Posts (Atom)